I would like to introduce you to a cooking tool that is seriously a game changer in just about every way: in flavor, efficiency, precision, and fool-proofness (is that a word?). As a mom of two little ones, it’s hard to get complete meals on the table every day, (and even if I did, let’s face it, my picky preschooler wouldn’t eat them anyway), but as a grown adult I still enjoy eating something other than my kids’ leftover pb&j scraps. I’ve always had an interest in cooking, but since having kids there isn’t always time to delve into something complicated or fancy. Heck, sometimes even cooking a plain chicken breast seems too exhausting at the end of a day filled with cleaning up countless messes, playing referee between my boys, and navigating preschool manipulation mine fields (seriously how are they experts in this?!). Enter, the Immersion Blender, otherwise known as the “Sous Vide” way of cooking.
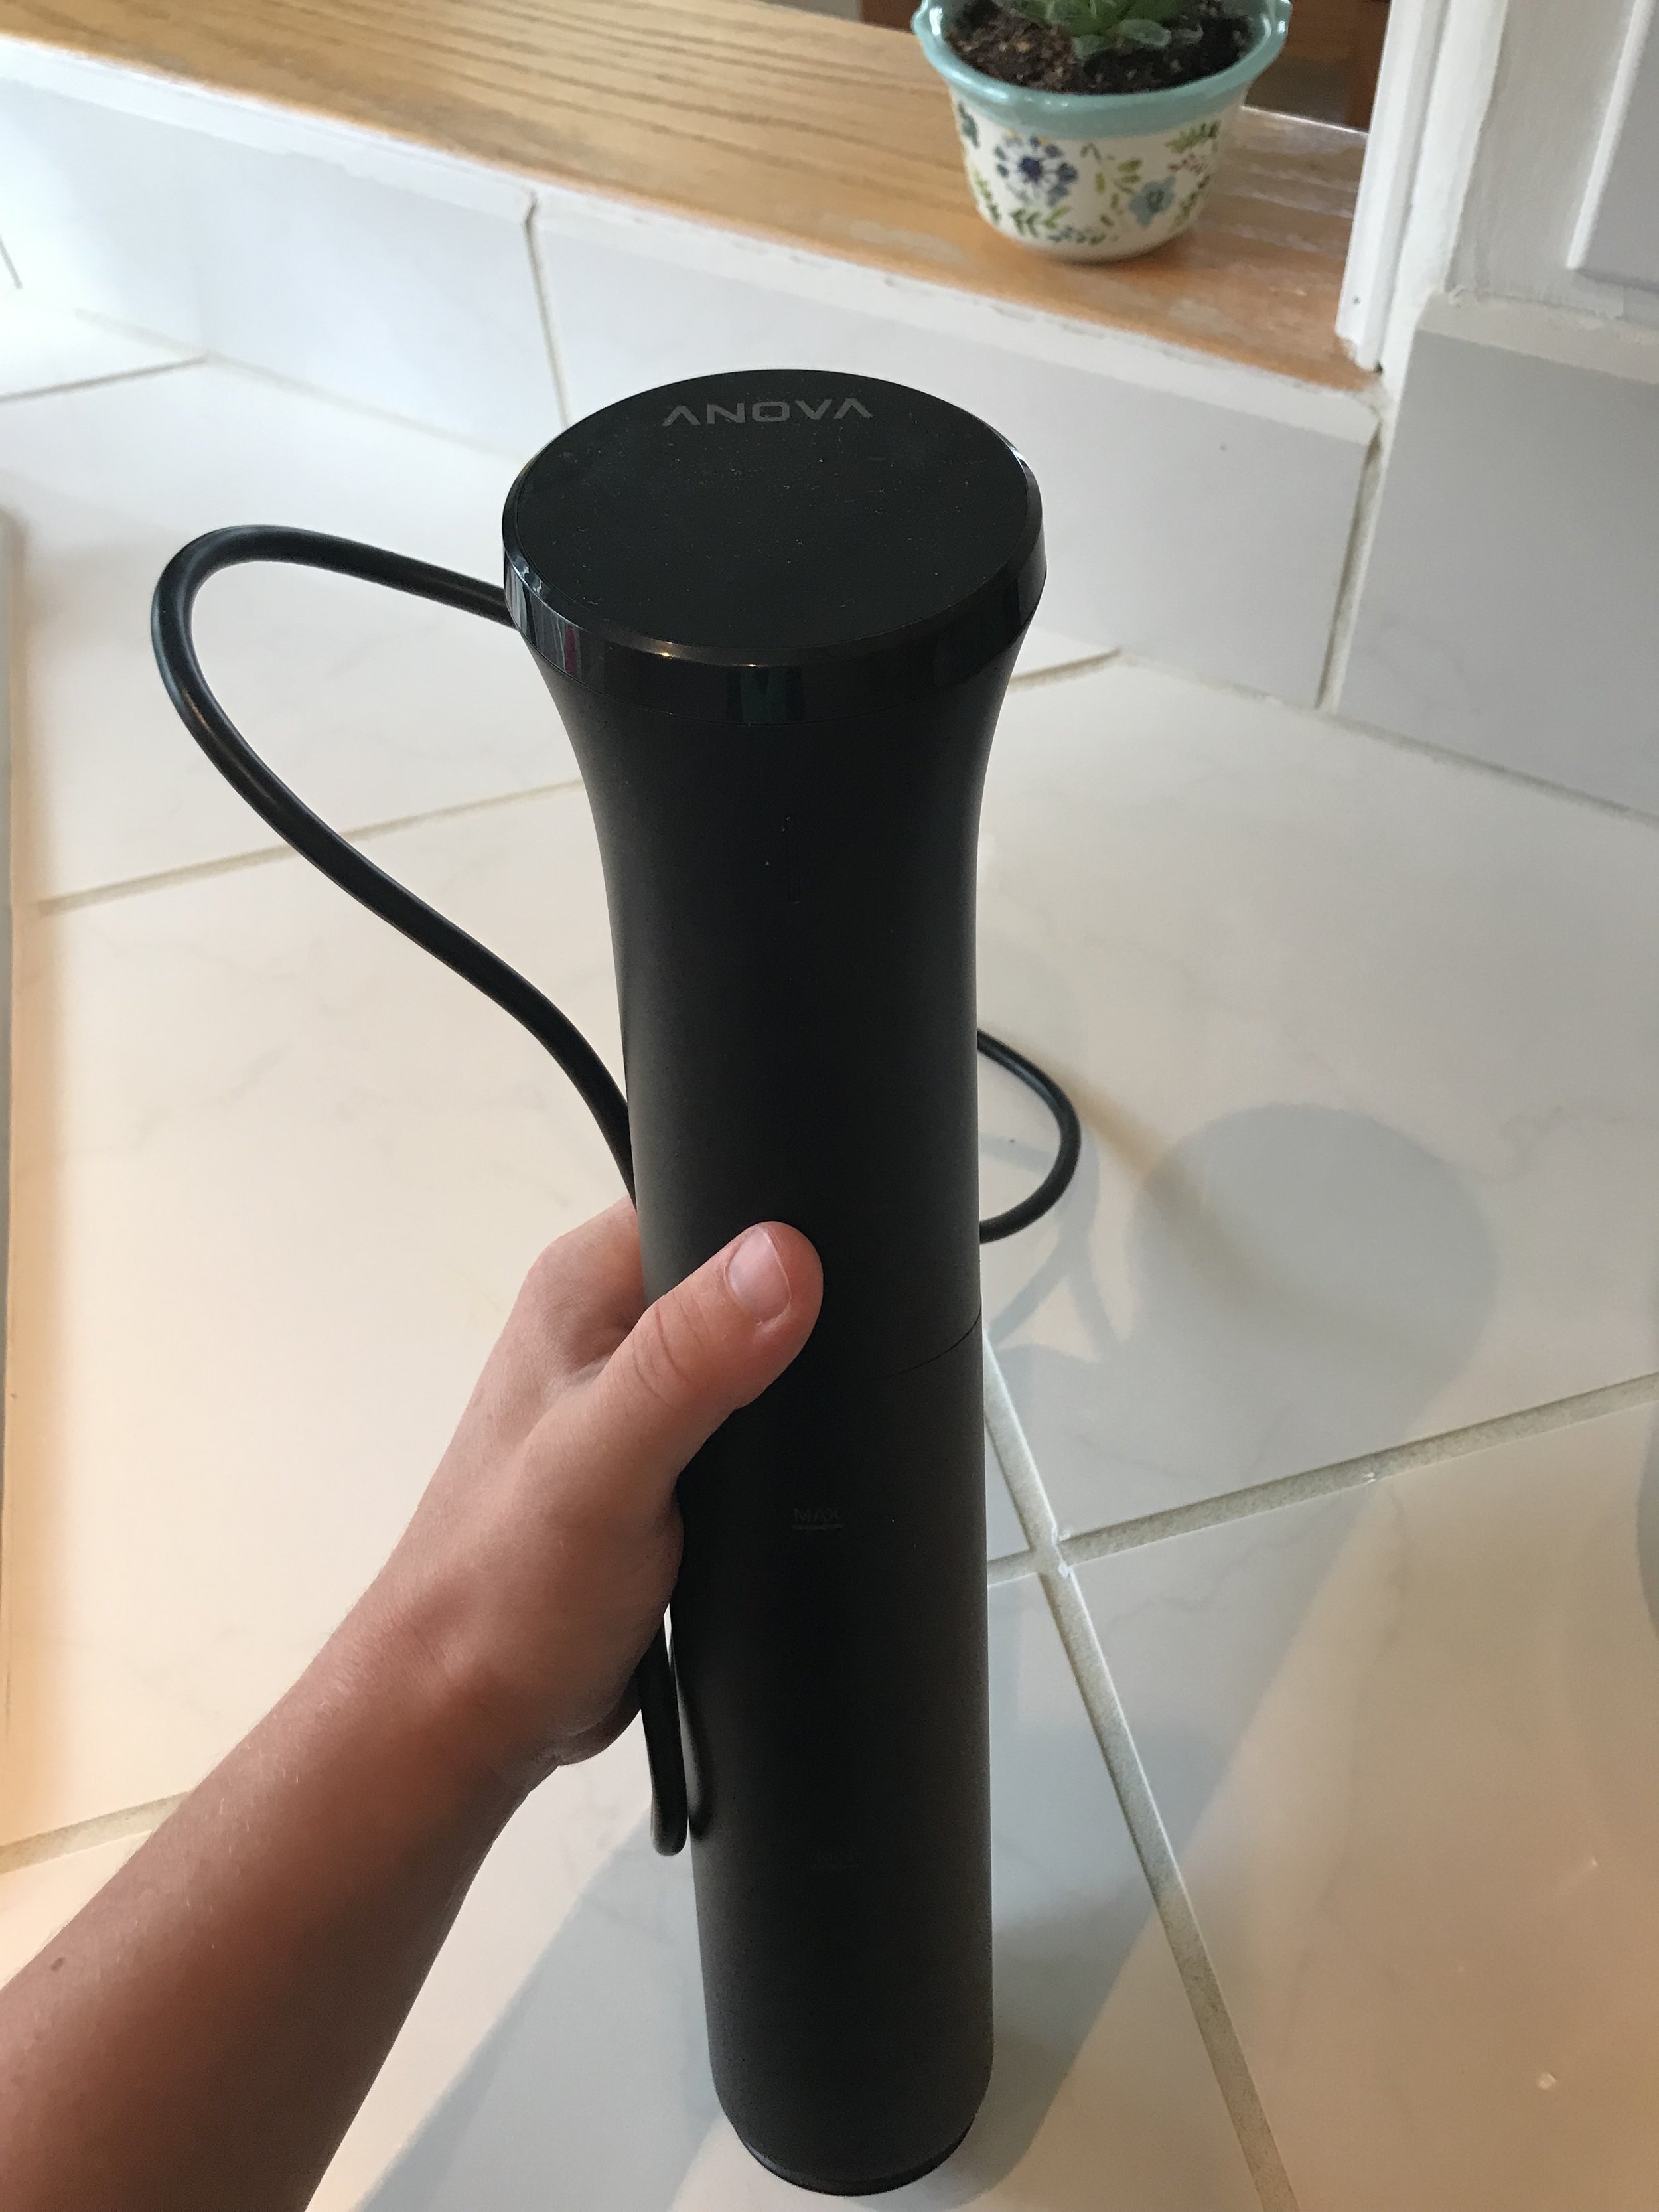
Our ANOVA brand Immersion Blender, also referred to as the Sous Vide method.

Side view, showing the screw attachment.
Sous Vide translates as “under vacuum” in French. The black rod you see in these pictures is actually called an immersion blender, which you secure to the side of a large pot or a plastic food grade tub. The method of cooking using this instrument is called “Sous Vide”. This is how it works: you fill up the pot with water, attach the immersion blender to the side, turn it to a specific temperature and the water begins to swirl ever so slightly as it heats up to the temperature you selected. The critical advantage of this tool is that it keeps your water at the exact same temperature the entire time it is cooking your food. It uses the low (temperature) and slow (time) philosophy which results in very tender meat. Unlike crock pots which get increasingly hotter over time even when placed on the lowest setting, or ovens, frying pans and grills that take the moisture out of your meat as it cooks your food relatively quickly, the Sous Vide method cooks your food in a water bath that is held at a consistent low temperature that never changes.
You might be wondering how in the world do you cook meat in water? We aren’t talking about boiling meat here, as you would if you were making bone broth. Meat cooked the Sous Vide way is placed into plastic bags before they are submerged into the water bath. When this happens, the juices in the meat get to stay there, as opposed to getting cooked out using other traditional methods. This results in very tender, very flavorful protein. You can use gallon bags, or use vacuum sealed bags using a food saver machine. (See recipes at the end for more details on how to use the bags).

Attach the immersion blender to an oversized pot or plastic food grade bucket.
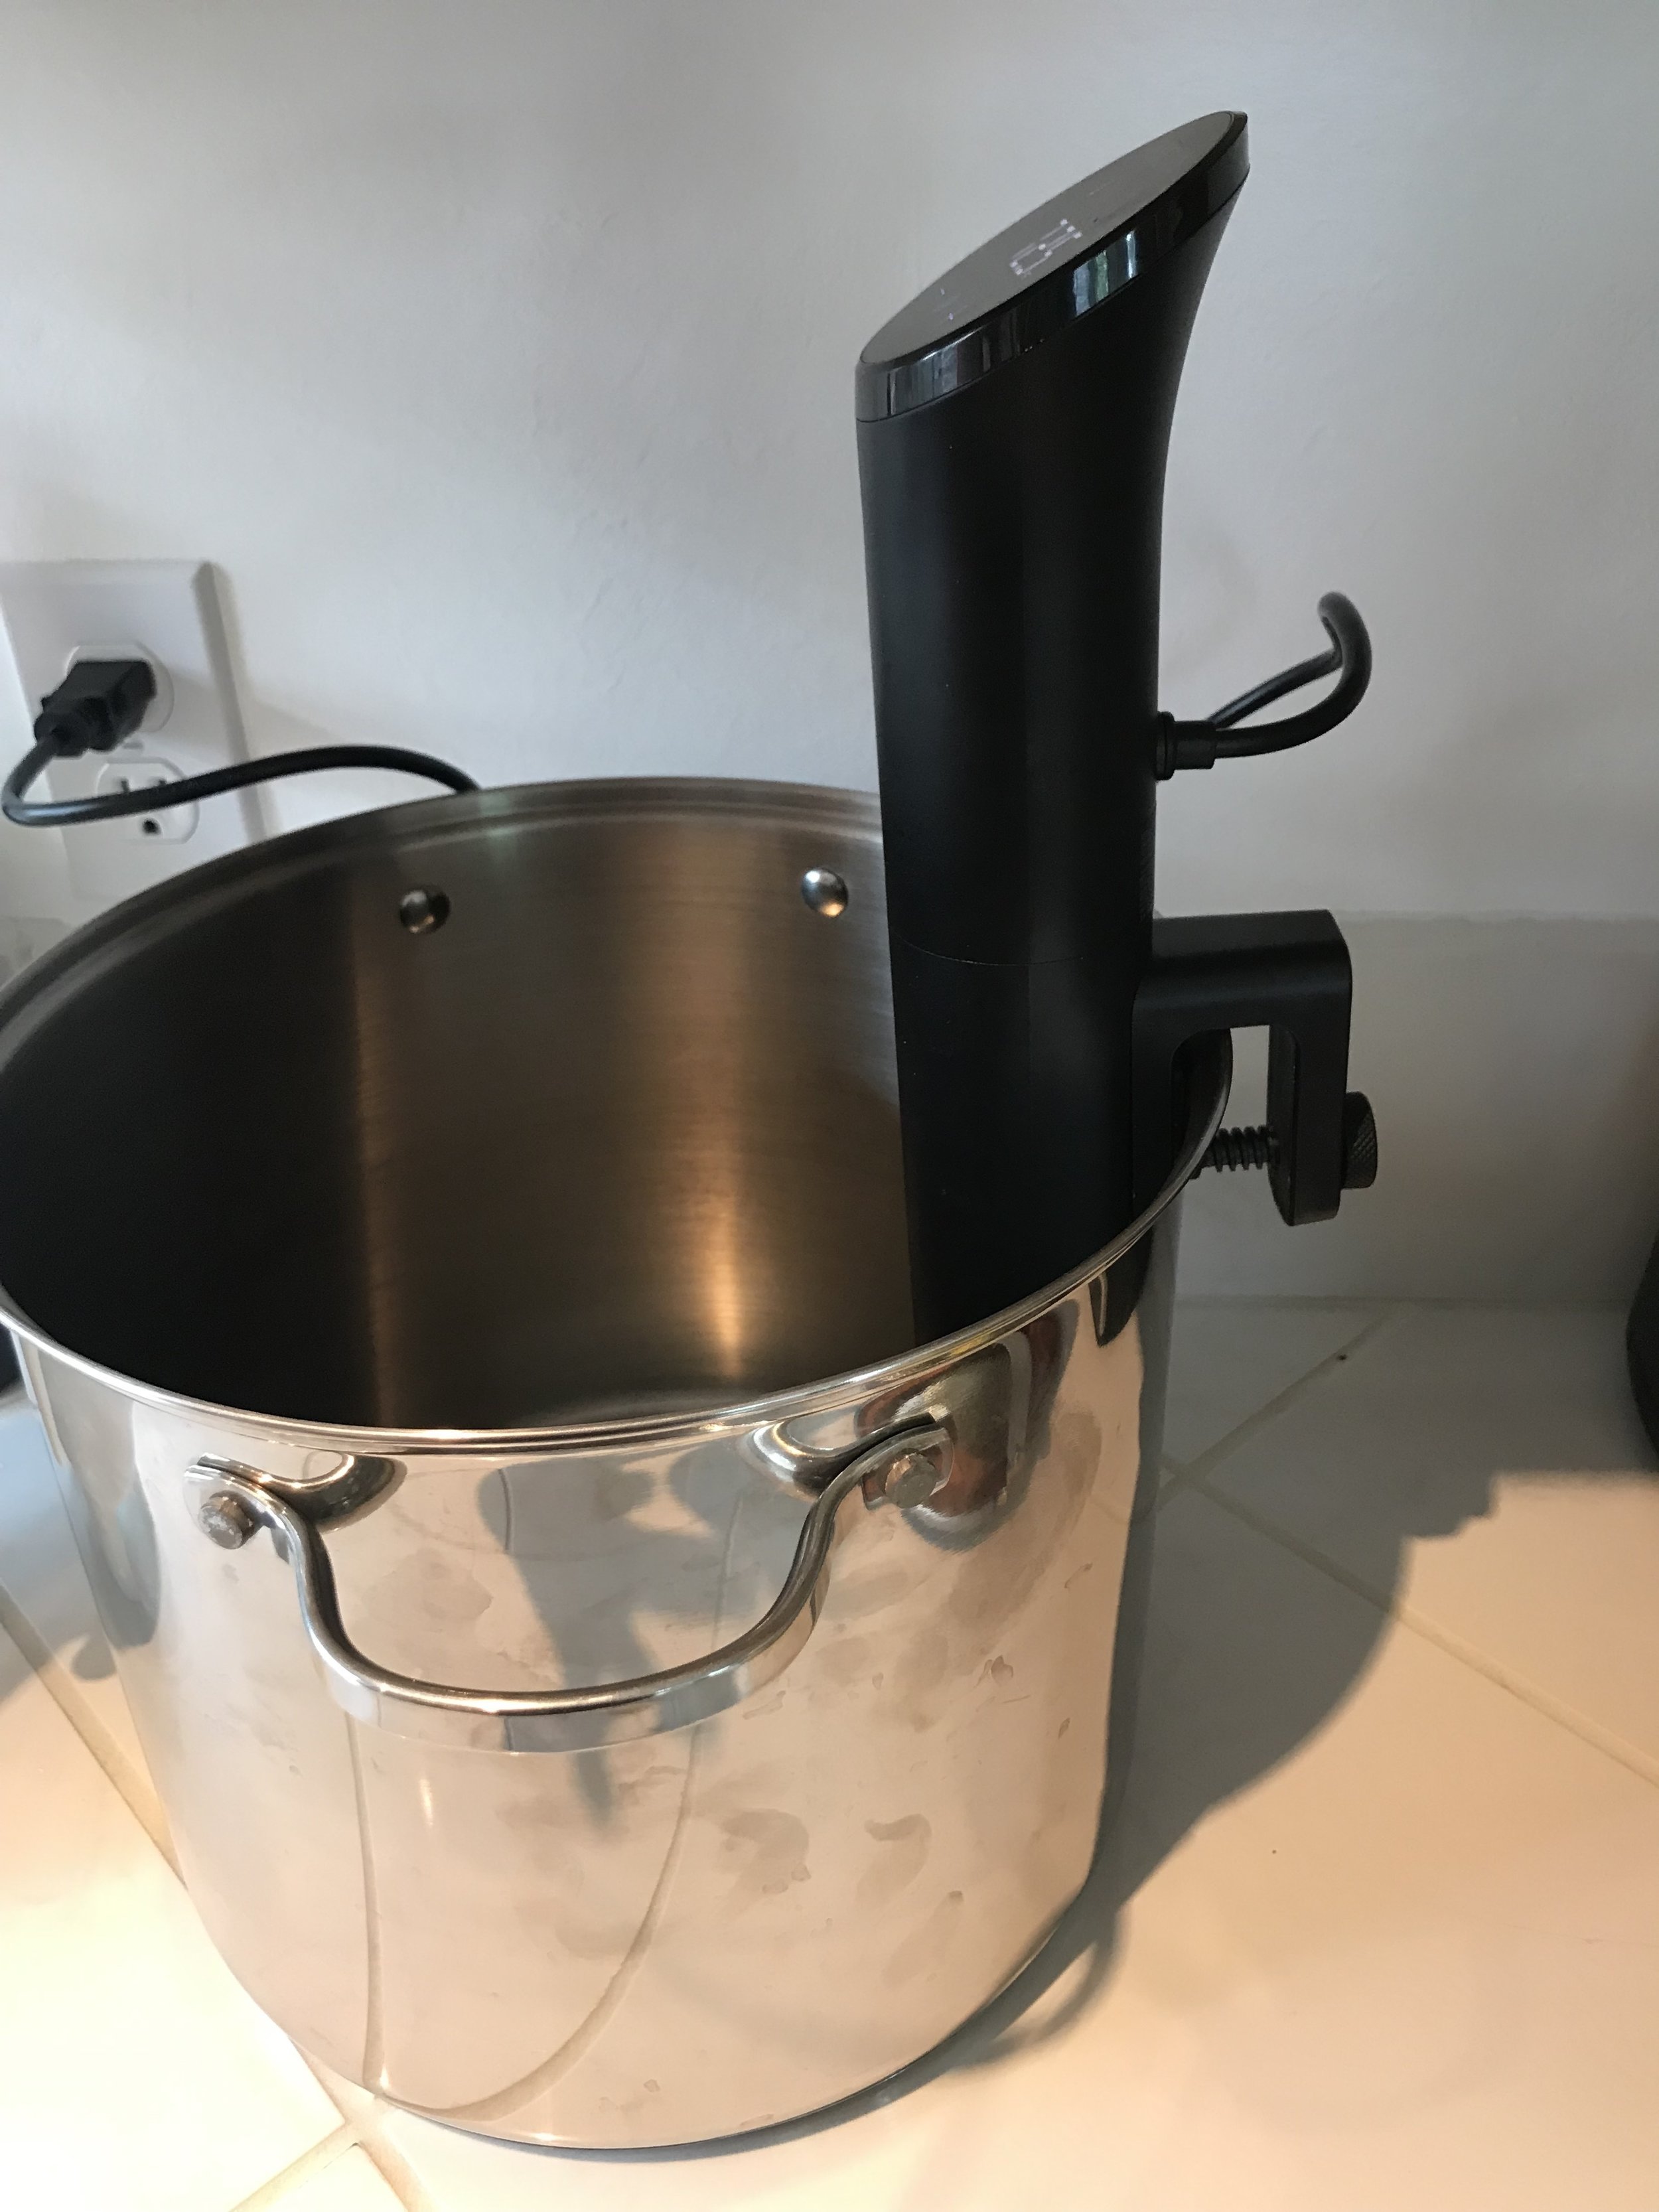
Side view.

Close-up of screw attachment that secures the immersion blender to the pot.
You might be thinking at this point that this method doesn’t seem too amazing to justify changing your ways. I would tell you that before I cooked this way, I thought the exact same thing. Even as the food was cooking in the water I was looking curiously into it as if there was some sort of sorcery contained in the waters that I just couldn’t understand. Let me also tell you, the first bite I had of my inaugural meal of pork chops cooked this way I was a believer, a convert, a die-hard fan of the Sous Vide method. There’s a difference you just have to taste to understand. Once you are fortunate enough to taste meat that has been cooked in this way, you’ll realize for yourself how easy it is to have restaurant-worthy cooking in your home as often as you want, prepared by you! Seriously, it’s so easy anyone can do it. The water does the work. All you have to do is look in the food guide for how long and at what temperature to cook something, place it in the bag, and step away!
If you’re an experienced cook, or you like diving in and learning new things, here is where cooking this way can be really incredible. Before you place your meat into a bag, marinade it. The “old way” of marinading that I was used to looked like this: place the meat in the marinade and then place it in the fridge to sit for several hours, or overnight. Then take the meat out of the bag, put it in the oven, a fry pan or on the grill. The meat would still end up dry, and the marinade would end up as a hard crust on the outside or falling off completely. Yuck.
With the Sous Vide method, your meat cooks while still in the marinade, all contained inside that bag that you would have placed in the fridge overnight, except now it’s in the water bath! This is the game-changer, folks. Your meat is cooking right in the juicy marinade, and that marinade is staying within the bag, and therefore soaks deeper into your meat while it cooks, not escaping like during classic methods of cooking. This is how you end up with such flavorful and juicy meat.
Lastly, if you really want to take this to the next level and wow yourself, or whoever it is you might be cooking for, finish off your meat after the Sous Vide by putting a nice sear on it with a frying pan. Whatever meat you are cooking in the water bath, (whether it’s chicken, steak, salmon, pork chops, etc), take it out of the bag when the timer has gone off, and place it right in a hot skillet to “put some color on it”, as my restauranteur husband would say. (Tip: to know if a skillet is hot enough for this, put some water on your fingertips and flick your fingers over the heated pan so the water sprays on the bottom of the pan. If the water sizzles and evaporates quickly, your pan is ready!) This last step of quickly searing the meat will seal in those juices that stayed within the meat by cooking with the Sous Vide method, as well as giving it a beautifully colored finish. It is during this last step where I break out my meat thermometer and check the exact temperature of the meat, so I know if it’s safely up to temperature, or at what level it will be eaten (ie. medium, medium-well, etc.). This will really impress someone who only eats, say, a steak at medium, you can deliver it perfectly like you know what you’re doing, even if you feel like you don’t!

Some salmon inside vac-seal bags, waiting for the seasoning to be added so they can be placed in the Sous Vide water bath.
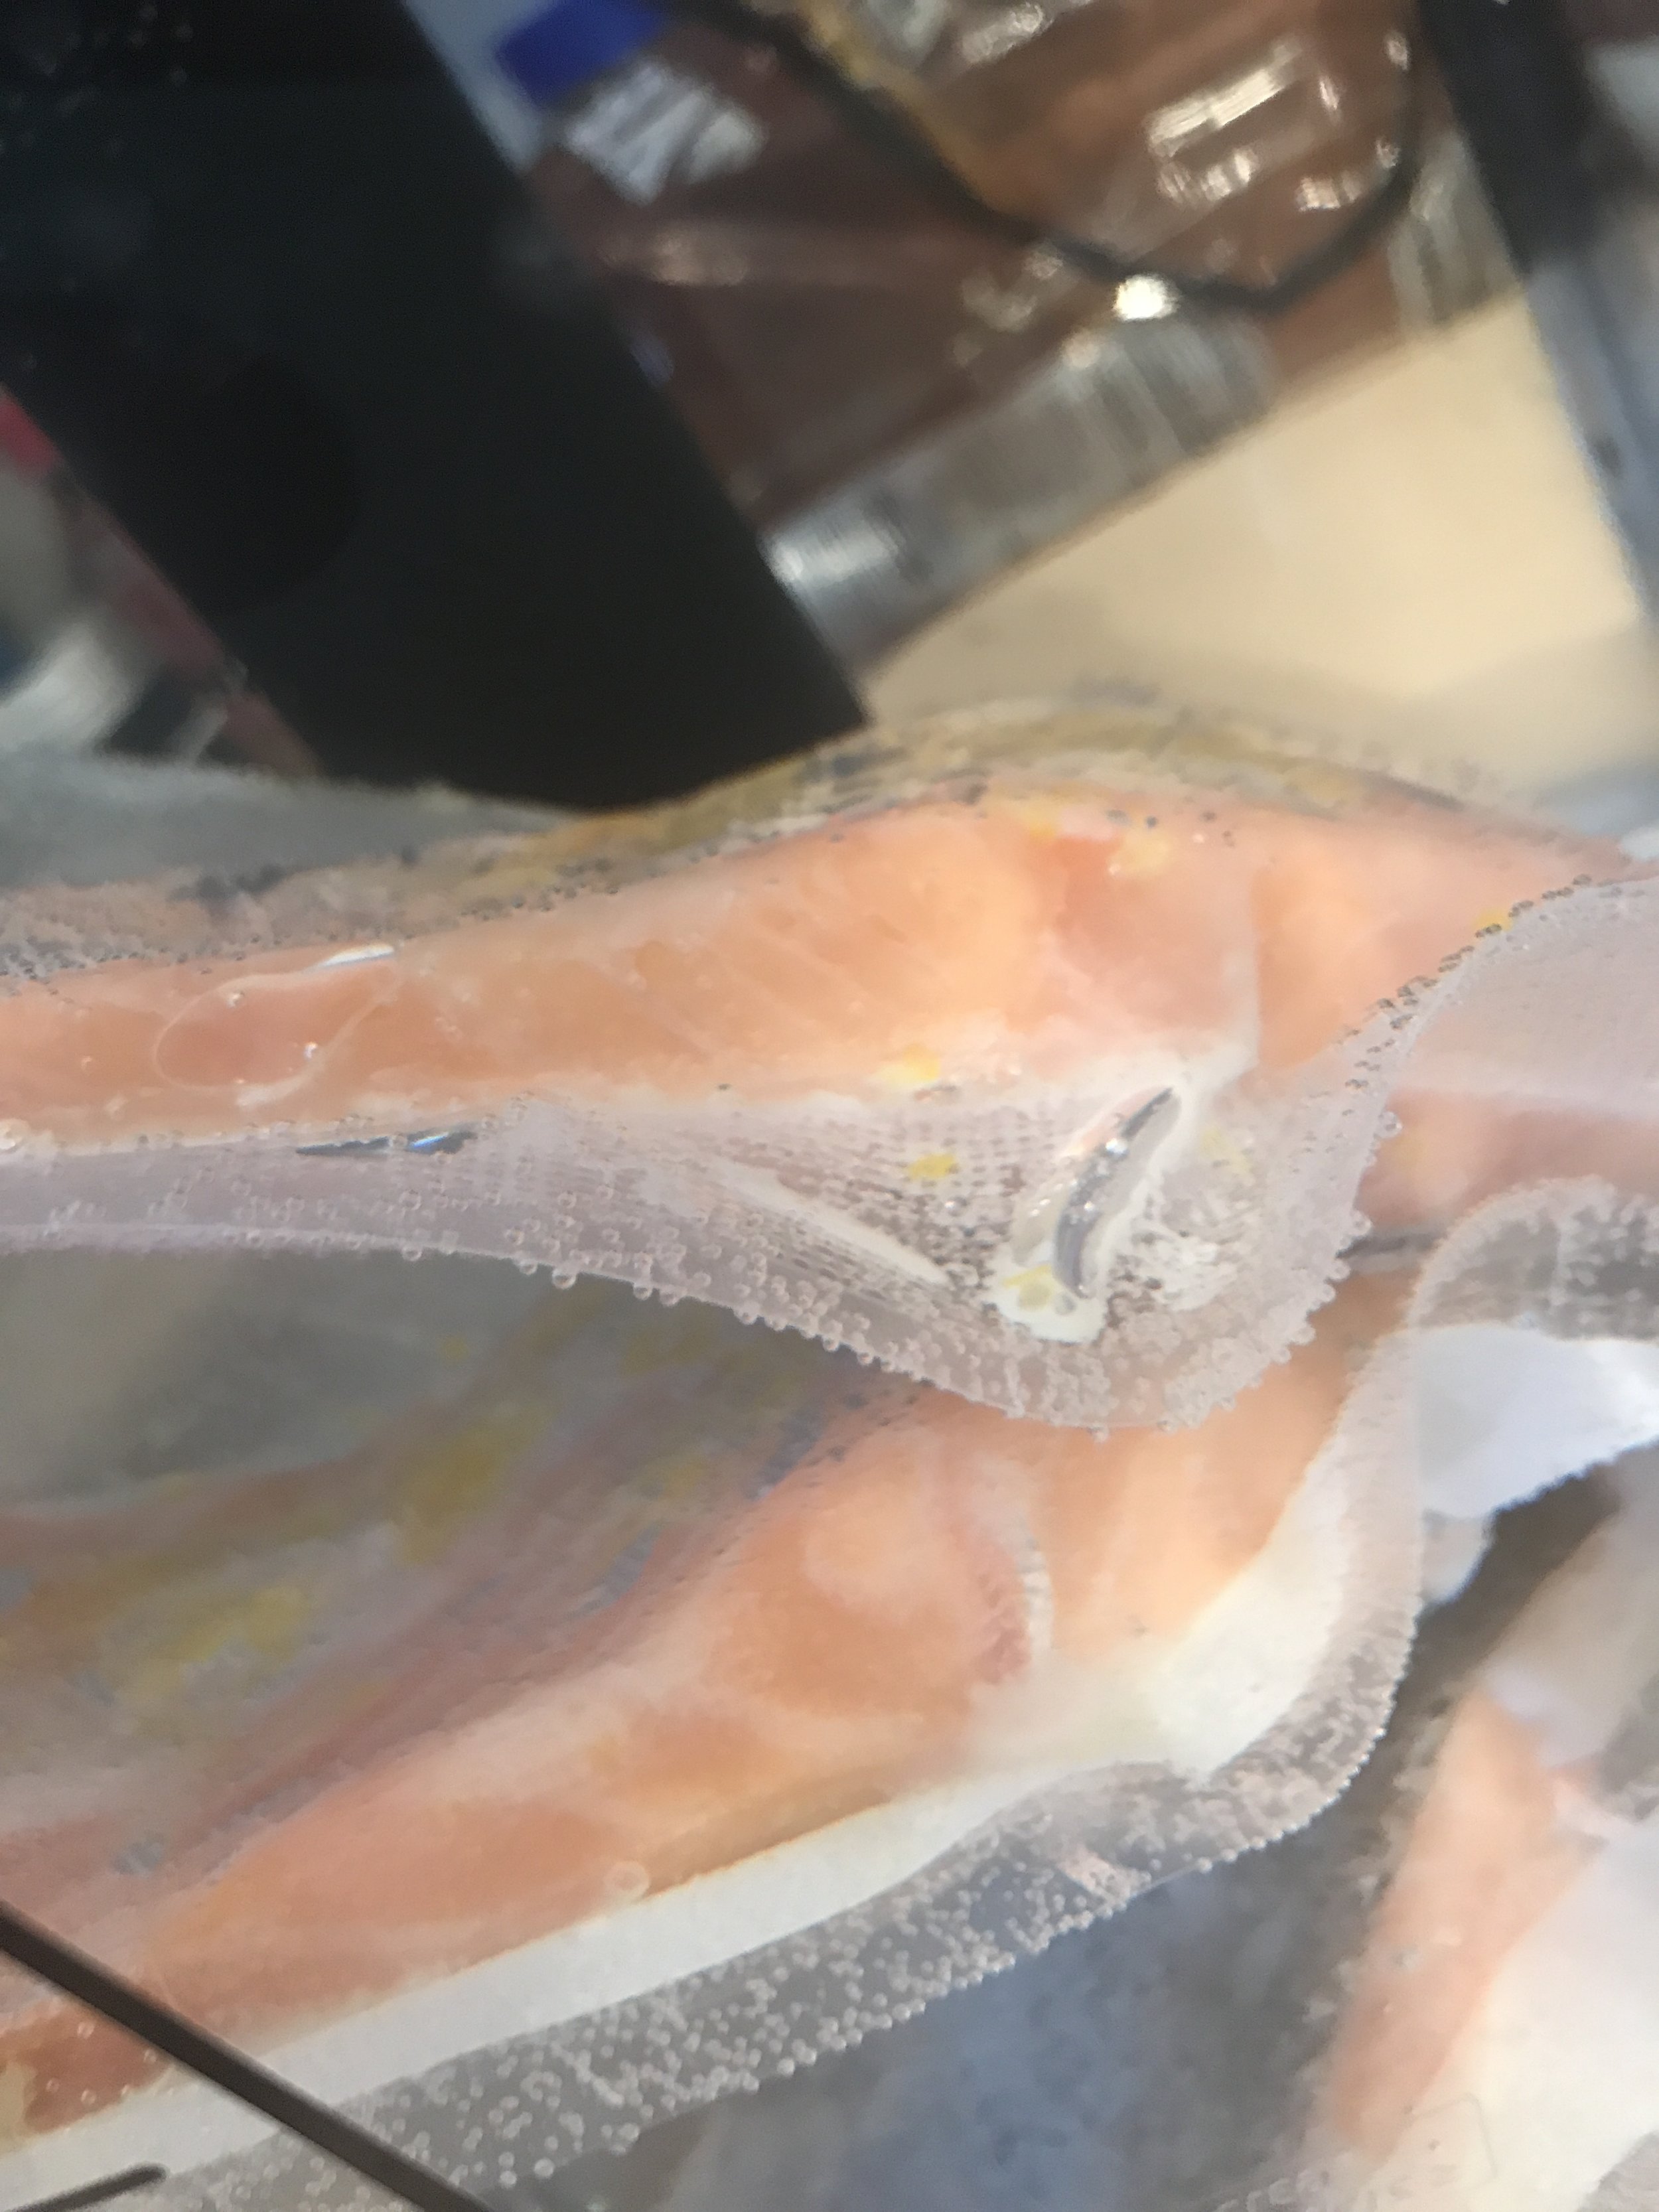
Close-up of salmon inside vac-seal bags in a water bath, cooked by an immersion blender, or “Sous Vide”.

A peek into the water-bath while the salmon is cooking with fresh lemon zest, shallots, and fresh herbs.
Now that you have an idea of what it means to cook using the “Sous Vide” method, I’ll give you a couple recipes to try!
First off, here is what you’ll need to purchase if you’re wanting to cook this way:
An immersion blender. We got ours at target.
A meat thermometer. Again, we got a cheap one at target that does the trick.
Gallon bags or vac-seal bags.
If you want vac-seal bags, you’ll need a vacuum sealer food saver machine.
If you want to use gallon bags, you’ll need clothes pins to secure the bag to the rim of the pot, so that the zip-lock part of the bag doesn’t go under the water. Since these bags aren’t 100% sealed, if they go under the water you’ll get water seeping into the bag which you don’t wan’t. This is why I opt to use the vac-seal bags and I don’t have to clothes-pin the bag to the side, I can just plop it right in the water and not worry about it.
A marinade recipe for chicken (for approx 1.5 pounds of meat):
1/4 cup brown sugar
4 Tbsp soy sauce
2 cloves garlic, minced
1 Tbsp fresh grated ginger
A couple turns of freshly cracked pepper
1 Tbsp coconut oil
Place all these ingredients in your bag of choice along with your unfrozen raw chicken, seal it using your bag method of choice (either vac-seal or zip lock; remember if you’re using zip-lock, make sure you secure the top of the bag to the side of your pot with a clip so water doesn’t enter the bag). Set your immersion blender for 2 hours at 140 degrees. When the timer goes off, take the chicken out of the bags and sear both sides in a hot skillet on the stove, along with the marinade. Cook on high until the marinade turns into a dark sticky glaze and your meat thermometer reaches 165 degrees.

Chicken searing in a fry pan with the marinade after being cooked using the Sous Vide method, waiting for the juice to reduce to a glaze because of the sugar it contains.

The “Sous Vide chicken” sliced up and plated with the glaze made from the marinade drizzled over the top. You can tell just by the picture how juicy that chicken is!
A recipe for pork chops, that will make you actually like pork chops! (If amount not noted, use enough of the ingredient to cover the chops)
Season all sides of pork generously with salt and pepper
Jerk seasoning
Brown sugar
1 Tbsp coconut oil per chop
Place one pork chop each into bag of choice, along with the other seasonings, and cook with the immersion blender for 1 hour at 140 degrees. When the timer has gone off, take your pork chops out of the bag, and sear them on both sides (about 1.5 minutes each side) in a hot skillet with melted butter to give the meat some beautiful color. Make sure your meat thermometer reads at least 145 degrees.

Pork chops searing in a cast iron skillet after being cooked using the Sous Vide method.

How beautiful are these Sous Vide cooked pork chops ready to be served to a hungry crew of fishermen!?
These recipes were for meat, but you can cook eggs and vegetables as well using an immersion blender. (Tip: if you have vegetables that have cooked in a water bath, dump them into the pan that you used to sear your meat, and finish them off in the scraps leftover from the meat searing. The flavor will transfer to the vegetables and give them some interesting texture and color…yum!) If you are using vac-seal bags, you can marinade and fully cook meals with your immersion blender and then put them in the freezer fully flavored and ready to be pulled out, thawed, and brought back up to temperature with whatever cooking method you choose when you are ready to eat. Talk about a game changer when it comes to weekly/monthly meal prep!
This way of cooking truly changes the flavor and texture experience of meat and I’ve never gotten so many compliments on my cooking as I have since I’ve begun using our immersion blender. Use this fool-proof method to wow your guests as well!
(Tip: if you purchase an Anova immersion blender, you can download the App in order to access recipes and cooking guides to help you cook like you know what you’re doing!)